

Key Takeaways
Why Planning Matters More Than the Frames
A gallery wall succeeds or fails in the planning stage, long before a single nail goes in. The most beautifully curated collection of art can look chaotic if it's placed without a guiding structure — and a humble set of thrifted frames can look intentional and polished with the right layout logic behind it. The good news is that effective planning requires nothing more than some paper, tape, and a tape measure.
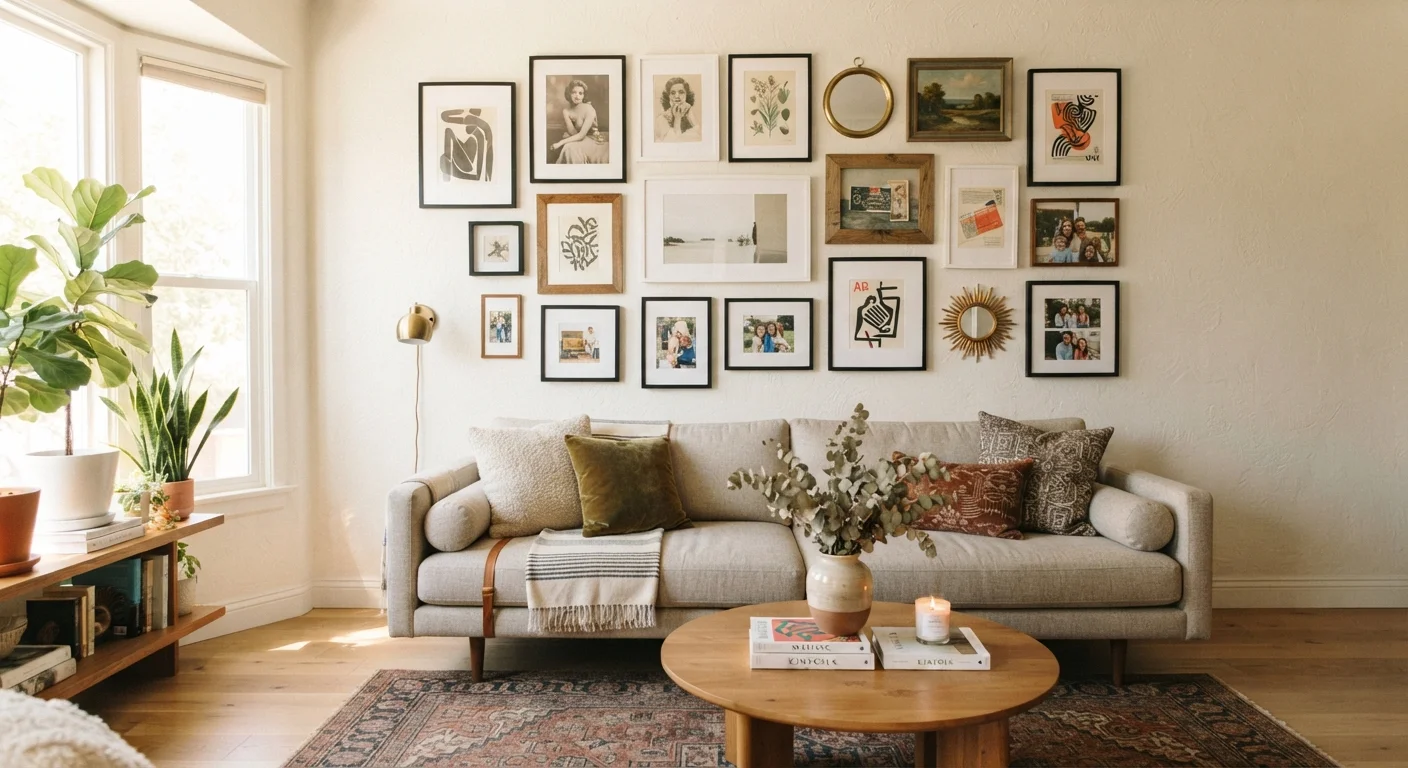
The core goal is to create an arrangement that reads as a composed whole rather than a random grouping. That means identifying a visual anchor, establishing a consistent spacing rhythm, and making deliberate decisions about frame finishes and artwork before anything touches the wall. If you're decorating a first home from scratch, a gallery wall is one of the highest-impact, lowest-cost ways to bring personality to a room — provided you plan it first.
Use Painter's Tape as a Test Grid
Before cutting any paper templates, mark the full footprint of your intended gallery wall on the actual wall using painter's tape. This quick step shows you exactly how much space you're working with and helps prevent a layout that feels too cramped or too sparse for the wall.
Tools and Setup
Before you begin, gather the basics. You don't need specialized equipment — just a few common items that make the process accurate and low-stakes.
What you will need
Tape measure
Measure wall space, frame dimensions, and spacing between pieces accurately.
Kraft paper or newspaper
Create full-size templates of each frame to test placement on the wall before nailing.
Painter's tape
Affix paper templates to the wall without leaving marks or damaging paint.
Level (or level app)
Keep frames perfectly horizontal so the finished wall looks intentional and polished.
Stud finder
Locate wall studs for secure hanging of heavier frames.
Pencil
Mark stud locations, nail points, and layout boundaries on the wall.
Step-by-Step: From Blank Wall to Finished Display
Find Your Studs Before You Hang
Heavier frames — especially those over 20 pounds — should be anchored into wall studs or secured with appropriate hollow-wall anchors rated for the load. Driving nails or screws into drywall alone can cause frames to fall and damage both the wall and the artwork. Use a stud finder and check anchor weight ratings before hanging anything substantial.
Measure and map your wall space
Start by measuring the exact width and height of the wall section you want to fill. Note any obstacles — light switches, outlets, or architectural features — that will affect placement. Transfer these measurements onto grid paper, using a simple scale (for example, one square equals six inches), so you have an accurate canvas to sketch on. Understanding the design principles behind scale and proportion will help you decide how much of the wall to actually fill versus leave open.
Gather and group your pieces
Lay all your frames face-up on the floor in the space in front of the wall. Sort them loosely by size — large, medium, and small. Identify your visual anchor: this is typically the largest or most striking piece, and it will serve as the starting point for your layout. Mix of frame shapes (landscape, portrait, square) adds movement; mixing sizes adds rhythm. Aim for variety without randomness.
Edit your frame finishes
One of the most common gallery wall mistakes is mixing too many frame finishes. Choose two or three that complement each other — for example, matte black, natural wood, and antique gold — and pull any outliers that clash. This doesn't mean every frame must match, but there should be a clear thread connecting them. Similarly, consider whether your artwork shares a unifying element: a consistent color palette, subject matter, or medium keeps a diverse collection from feeling chaotic. For more on curating a visually cohesive display, see our guide on styling mixed objects without clutter.
Create paper templates and test your layout
Trace each frame onto kraft paper or newspaper and cut out the templates. Label each template on the back with the piece it represents. Tape the templates onto the wall using painter's tape, starting with your anchor piece — typically positioned slightly left of center or at eye level. Build outward, maintaining 2–3 inches of consistent spacing between each piece. Step back frequently to assess the overall shape and density of the arrangement.
Mark nail points and hang your pieces
Once your paper layout is finalized, mark the nail point through each template directly onto the wall with a pencil — most frames hang from a wire or sawtooth hanger a set distance from the top, so measure this offset before marking. Remove the templates one at a time, drive your nails or anchors, and hang each piece before moving to the next. Use a level after each hanging and check the full arrangement as you go rather than adjusting everything at the end.
Once everything is hung and level, step back and give the wall a final review at a distance. A completed gallery wall should feel settled — anchored by its largest piece, varied in size and shape, but unified by consistent spacing and a coherent frame palette. If something feels off, it's usually a spacing inconsistency or one frame that doesn't belong in the grouping. Removing a single outlier or adjusting one gap often resolves the issue without starting over.
A well-planned gallery wall also tends to be more adaptable over time. Because the spacing and anchor logic are intentional, adding or swapping a single piece later is straightforward. For a broader look at how arrangement principles apply throughout your home, our room-by-room décor audit walks through what to look for in each space.