

Key Takeaways
Why Bookshelves So Often Look Like Organized Chaos
A bookshelf starts with a functional job — holding books — and gradually accumulates everything that doesn't have another home: photo frames, souvenirs, chargers, half-burned candles, paperwork. Even when individual items have meaning, the combination reads as clutter because there's no visual hierarchy, no breathing room, and no intentional arrangement. The fix isn't a bigger shelf or fewer belongings; it's a styling approach that treats the shelf as a display surface with its own compositional logic.
Understanding a few basic principles — rhythm, balance, and scale — goes a long way. These are the same fundamentals that make a whole room feel cohesive, which is why bookshelf styling is a useful entry point if you're decorating your first home from scratch and want to build your eye gradually.
Painter's tape or sticky notes
Label shelf zones as you plan arrangements before committing objects to their positions.
Microfiber cloth
Wipe down each shelf before restyling — dust visually undermines even the best arrangements.
Small risers or sturdy books stacked horizontally
Create height variation within a shelf to give shorter objects more visual presence.
What You'll Need Before You Start
Bookshelf styling requires almost no special equipment, but a little preparation makes the process smoother and the result more durable. Gather the following before you begin:
What you will need
If you're working with open shelving in other rooms — particularly the kitchen — the styling logic overlaps in some ways but diverges in others. Our piece on the practical trade-offs of open kitchen shelves covers the differences worth knowing.
Step-by-Step: How to Style Your Shelf
Work through these steps in order. Skipping the early editing and planning stages and jumping straight to decoration is the most common reason a restyled shelf reverts to looking cluttered within a few weeks.
Clear Everything Off and Clean the Shelves
Remove every item from the bookshelf and set it aside on a nearby surface. Wipe each shelf down with a damp microfiber cloth so you're starting with a clean, visible surface. This blank-canvas moment also gives you an honest look at the shelf's proportions — how tall each section is, whether the shelves are fixed or adjustable, and where light naturally falls.
Edit Your Items Down to What Deserves Display
Lay everything out and sort into three piles: items you definitely want displayed, items you're unsure about, and items that really belong in storage. Books with cracked, mismatched, or faded spines may work better stored in a basket or closet rather than on open shelves. Be selective — a shelf with 70% of its capacity filled almost always looks more intentional than one packed to the edge.
[tip_callout]Establish a Color Logic Across the Shelf
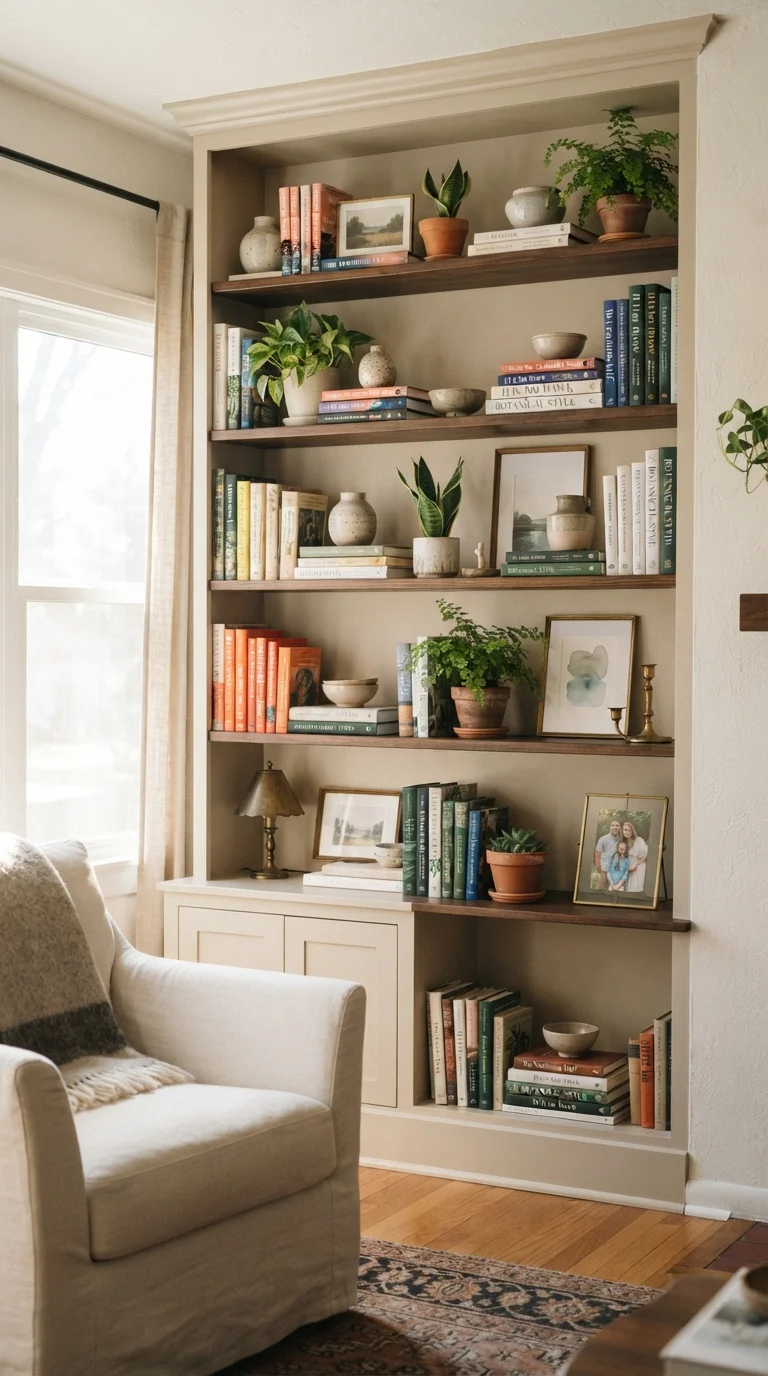
You don't need to color-sort your books rainbow-style (a look that can feel more performative than personal), but establishing a loose color palette helps the shelf read as cohesive. Pull two or three dominant tones from the room — perhaps the sofa fabric, a rug color, or a wall tone — and let those guide which objects and book spines take center stage. Books with clashing dust jackets can be turned spine-in for a quieter, more uniform look.
Vary Book Orientation to Create Visual Rhythm
Alternate between vertical stacks and horizontal stacks (books laid flat) as you work across and down the shelves. Horizontal stacks do double duty: they break up the monotony of upright rows and create small platforms for objects like a small plant, a candle, or a framed photo. Aim for roughly two-thirds of each shelf to be books, with the remaining third open for objects and negative space.
Arrange Decorative Objects in Odd-Numbered Groups
Groupings of three or five objects consistently read as more natural to the eye than pairs or evenly matched sets. Within each group, vary the height, texture, and shape — a tall vase next to a small ceramic dish next to a trailing plant, for instance. Place the tallest item toward the back or side of the group rather than in the center, which can look stiff. For broader guidance on the visual principles at work here, see our guide to the design fundamentals behind well-composed rooms.
Build in Intentional Negative Space
Resist the urge to fill every inch. A shelf section left partially bare — just a stack of books and a single object — reads as a deliberate design choice rather than emptiness. Think of negative space as breathing room that lets the eye rest before moving to the next visual moment. Step back and squint at the shelf: if one area looks heavy and another looks sparse, redistribute objects until the visual weight feels balanced across the whole unit.
[important_callout]Step Back, Photograph, and Refine
Once you've placed everything, take a photo on your phone and look at it — a small screen flattens the view and reveals proportion issues that your eye skips over in person. Common fixes at this stage include removing one item that's competing for attention, adjusting the height of a stack, or shifting an object from a busy zone to a quieter one. Live with the arrangement for a few days before declaring it finished; fresh eyes often catch what tired ones miss.
If you're styling shelves as part of a broader room refresh, the room-by-room décor audit can help you identify other quick wins in the same space.
Maintaining the Look Over Time
The most beautifully styled shelf will drift toward chaos if there's no system for keeping it in check. Set a light rule: anything that lands on the shelf temporarily (mail, keys, random objects) gets relocated within 24 hours. Every few months, do a quick edit — remove anything that has accumulated without intention and check whether the overall balance still holds.
If you share your home with others, a brief conversation about which shelves are display surfaces and which are open storage can prevent friction and preserve your styling work. For renters who want stylish shelves without permanent modifications, reversible décor strategies can help you achieve the same effect within your lease terms.
Avoid Matching Everything Too Closely
Over-coordinating colors and shapes can make shelves look staged rather than lived-in. A shelf that feels authentically curated usually includes one or two unexpected elements — a well-worn book spine, an imperfect ceramic piece — that break the rigidity. Aim for cohesion, not uniformity.